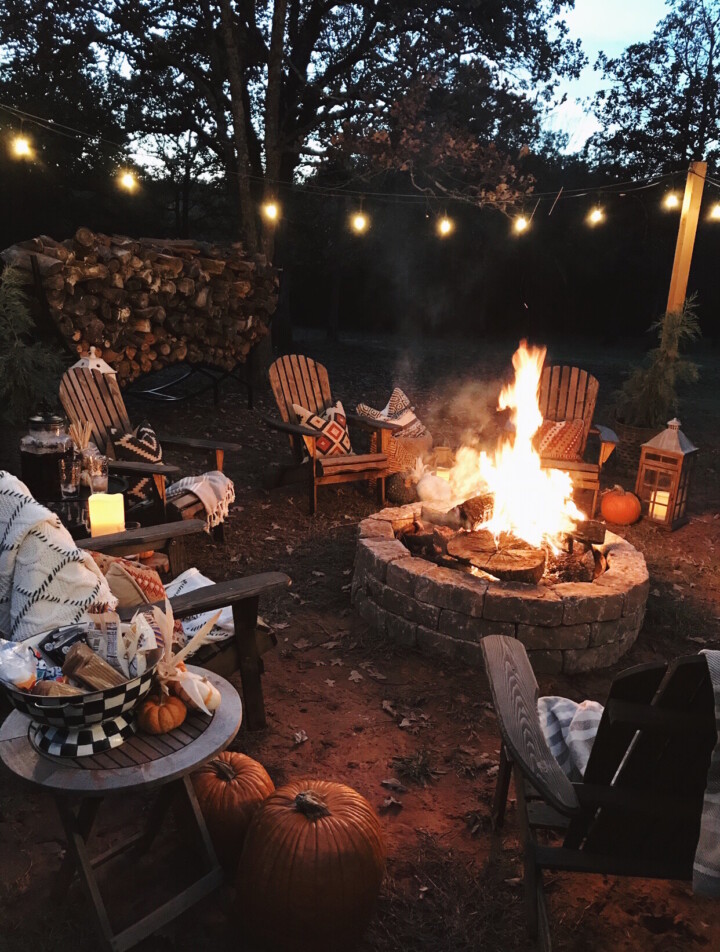
A crackling fire pit can wonderfully transform the ambiance of any outdoor setting. However, the incessant smoke emitted can be quite a spoiler, sticking to your clothes and causing discomfort. But what if you could enjoy a fire pit without the annoyance of smoke? Welcome to the world of DIY smokeless fire pits! This comprehensive guide will walk you through the steps to construct your very own smokeless fire pit, ensuring you and your loved ones can relish those cozy evenings around the fire without any smoke-induced hassles.
Image: diy fire pit area on a budget
Understanding Smokeless Fire Pits
Before we delve into the construction process, it’s important to understand what makes a fire pit smokeless. Essentially, a smokeless fire pit is designed to promote more efficient combustion, thereby reducing the smoke generated. This is achieved by increasing airflow, which helps the fire burn hotter, and by re-burning the smoke produced during primary combustion.
How Does a Smokeless Fire Pit Work?
A smokeless fire pit operates based on two key principles: primary combustion and secondary combustion. In primary combustion, oxygen reaches the fire from the bottom, nourishing it and ensuring it burns efficiently. Secondary combustion, on the other hand, involves heated oxygen traveling up through a chamber between the fire pit stones and the fire pit ring, and then being released out of drilled holes into the top of the fire pit ring. This second dose of oxygen helps reduce smoke production.
Benefits of a Smokeless Fire Pit
The most significant advantage of a smokeless fire pit is, of course, minimal smoke emission. But that’s not all! These fire pits also provide more heat as they burn hotter, making them ideal for colder evenings. Additionally, they consume less firewood compared to traditional fire pits, making them a more sustainable choice.
Preparations for Building a Smokeless Fire Pit
Gather Your Materials
To build a smokeless fire pit, you will need a few specific materials and tools. These include:
- A metal fire pit insert or stock tank ring: This forms the inner core of the pit. The insert should be hollow and approximately 36 inches wide and 10 to 12 inches high.
- Masonry pavers: These are used for the outer wall of the fire pit. You’ll need around 72 retaining wall blocks.
- Granite drainage gravel: This provides a sturdy base for your fire pit. You’ll need about three cubic yards of 1/4-inch gravel.
- Fire-resistant sealant and landscape block adhesive: These are used to seal cracks and bind the pavers together, respectively.
- High-heat spray paint: This is used to paint the inside of the pit for a unique look.
- An electric drill with a 1/4-inch drill bit and a 3/4-inch annular drill bit: These are used to drill holes in the insert.
- A caulking gun: This is used to apply the sealant and adhesive.
- A tape measure, pencil, and painter’s tape: These are used for marking the location of the holes on the insert.
- A metal file: This is used to sand down the holes and make the insert safe to touch.
- A shovel and bubble level: These are used to prepare the base for the fire pit.
Safety Precautions
Always prioritize safety when undertaking a DIY project. When drilling or cutting metal, wear eye protection and gloves to protect yourself from flying metal shavings. Also, if you’re planning to paint the insert, ensure you’re in a well-ventilated area to avoid inhaling harmful fumes.
Steps to Build a DIY Smokeless Fire Pit
Now that you’re equipped with the necessary knowledge and materials, it’s time to get started on building your smokeless fire pit!
Step 1: Marking the Hole Locations
Begin by marking the location of the air vent holes along the top of the fire pit insert. Use a tape measure to mark two inches down from the top, and then mark points two inches apart, side-to-side, for each hole.
Step 2: Drilling Holes in the Insert
Next, use a 1/4-inch drill bit to drill holes at each marked location on the insert. Ensure the drill bit is suitable for drilling in metal.
Step 3: Enlarging the Holes
Once the initial holes are drilled, use a 3/4-inch annular drill bit to enlarge each hole. The larger holes will allow more air to pass through, promoting better combustion.
Step 4: Sanding the Holes
After drilling, there will be rough metal edges around the holes. Use a metal file to smooth these down and dull any sharp edges. This step is not only for safety but also to make the insert more aesthetically pleasing.
Step 5: Sealing and Painting the Insert
Now it’s time to seal any cracks on the fire pit ring with fire-resistant sealant. This prevents smoke from escaping through the cracks. Once the sealant dries, you can spray the inside and outside of the fire pit insert with high-heat spray paint. This step is optional, but it can give your fire pit a unique look.
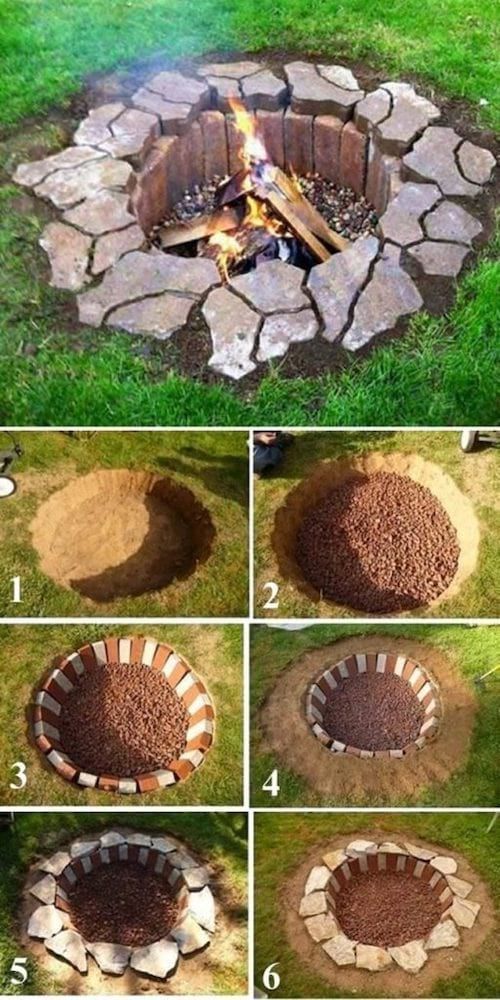
Step 6: Preparing the Fire Pit Base
First, choose a suitable location for your fire pit. It should be on a flat, fire-resistant surface and away from your home or any flammable materials. Once you’ve chosen a spot, dig out a 60-inch diameter circle that is 2 inches deep. Check for level with the bubble level, and then fill the space with the 1/4-inch drainage gravel.
Step 7: Creating the Paver Tiers
Place the insert on the prepared gravel base. Then, build the first tier of paver stones around the insert, maintaining a gap of two inches on all sides. This gap is necessary for air circulation and secondary combustion.
Step 8: Finishing the Tiers
Next, build three more tiers of paver stones on top of the first tier. Remember to stagger the blocks and use landscape block adhesive to secure them in place.
Step 9: Adding the Fire Pit Insert
Once the paver tiers are complete, set the fire pit insert onto the tiers of blocks from above. It should fit snugly within the pavers, with the top lip of the insert resting on the top tier of pavers.
Step 10: Testing the Fire Pit
Finally, it’s time to test your DIY smokeless fire pit! Light a fire and observe. Initially, there may be some smoke until the secondary combustion process begins. After that, you should see a significant reduction in smoke production.
DIY Fire Pit Ideas
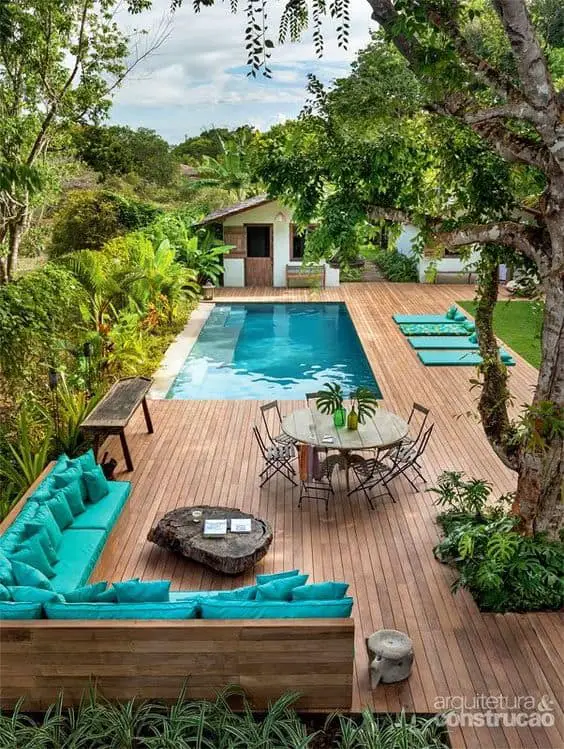
While the above guide provides a basic design for a DIY smokeless fire pit, there are numerous ways you can customize it to suit your preferences and match your outdoor decor. For instance, you could use different types of pavers or stones for a unique look, or add decorative elements like fire glass or lava rocks inside the pit. You could also incorporate seating around the fire pit, such as built-in benches or comfortable outdoor chairs.
Remember, the key to making a smokeless fire pit work effectively is to maintain good airflow and burn dry, well-seasoned wood. With these essentials in place, you can look forward to many enjoyable, smoke-free evenings around your DIY smokeless fire pit!
Final Thoughts

Building a DIY smokeless fire pit may seem like a daunting task, but with the right materials and a bit of effort, it’s an achievable project that can drastically enhance your outdoor living space. Whether you’re hosting a backyard party or simply enjoying a quiet evening with family, a smokeless fire pit provides the warmth and ambiance of a traditional fire pit without the annoyance of smoke. So why wait? Follow this guide and start building your DIY smokeless fire pit today!
10 Stunning Outdoor Sunken Lounge Ideas for Your Backyard Oasis
FAQs
How to make a smokeless fire pit?
You can make a smokeless fire pit by creating a two-walled design that promotes better airflow and secondary combustion. This involves using a metal fire pit insert or stock tank ring as the inner wall and masonry pavers as the outer wall. The insert/ring should have vent holes drilled around the top for secondary combustion, and there should be a gap between the insert/ring and pavers for air circulation.
What makes a fire pit smokeless?
A fire pit is made smokeless by increasing the efficiency of combustion, which reduces the smoke produced. This is achieved by promoting better airflow to burn the fire hotter and re-burning the smoke produced during primary combustion.
What’s the best material to build a smokeless fire pit?
The best material to build a smokeless fire pit is a combination of a metal fire pit insert or stock tank ring for the inner wall, and masonry pavers for the outer wall. The insert/ring should be hollow and approximately 36 inches wide and 10 to 12 inches high, while the pavers should be sturdy and heat-resistant.
Can you convert a regular fire pit into a smokeless one?
Yes, you can convert a regular fire pit into a smokeless one by adding a metal fire pit insert or stock tank ring with vent holes, and ensuring there’s a gap between the insert/ring and the existing fire pit walls for air circulation.
How to maintain a smokeless fire pit?
Maintaining a smokeless fire pit involves regularly cleaning out ashes, ensuring the vent holes aren’t blocked, and periodically checking the fire pit walls for any damage or wear. It’s also important to always burn dry, well-seasoned wood to ensure efficient combustion and minimal smoke production.
Discover more from Decoholic
Subscribe to get the latest posts sent to your email.